Radar Chart Widget allows you to shows multivariate data of three or more quantitative variables mapped onto an axis. You can build this widget easily with Enter Addons.
Using Radar Chart Widget:
You can see the below video to get an insight into how you can use the Radar Chart Widget, Or you can follow the documentation whichever you find convenient.
Video Here
Step 1
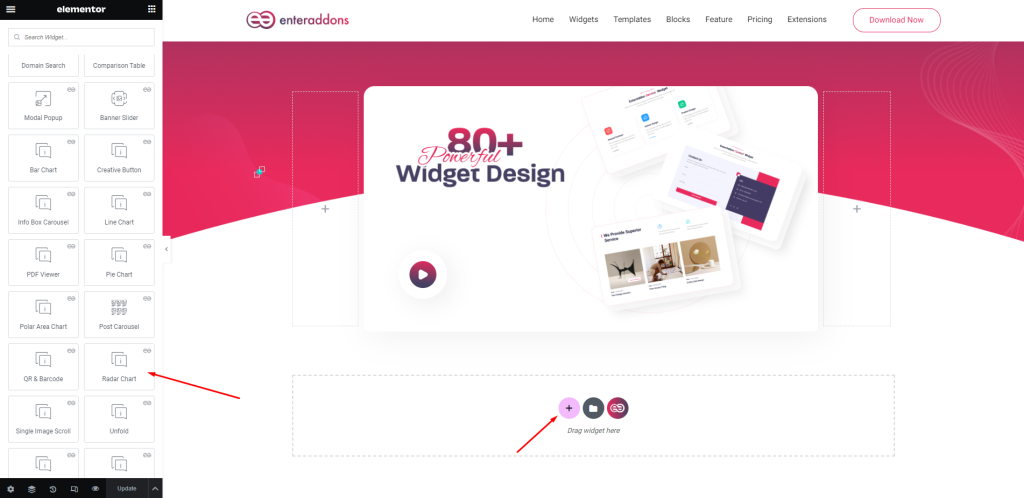
Firstly, select the Radar Chart Widget from the menu bar on the left-hand side of your screen and drag and drop it in the selected area.
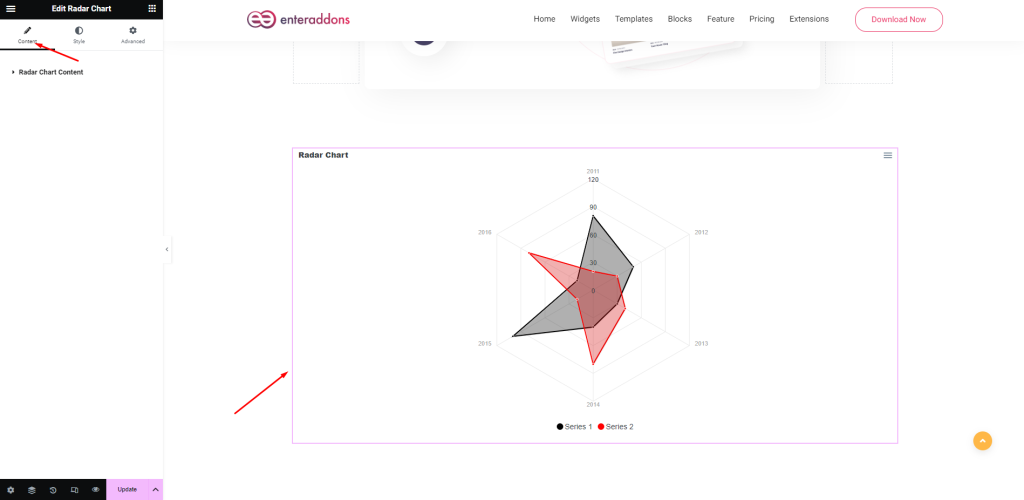
Secondly, from ‘Content’ Tab you will get Radar Chart Content Section.
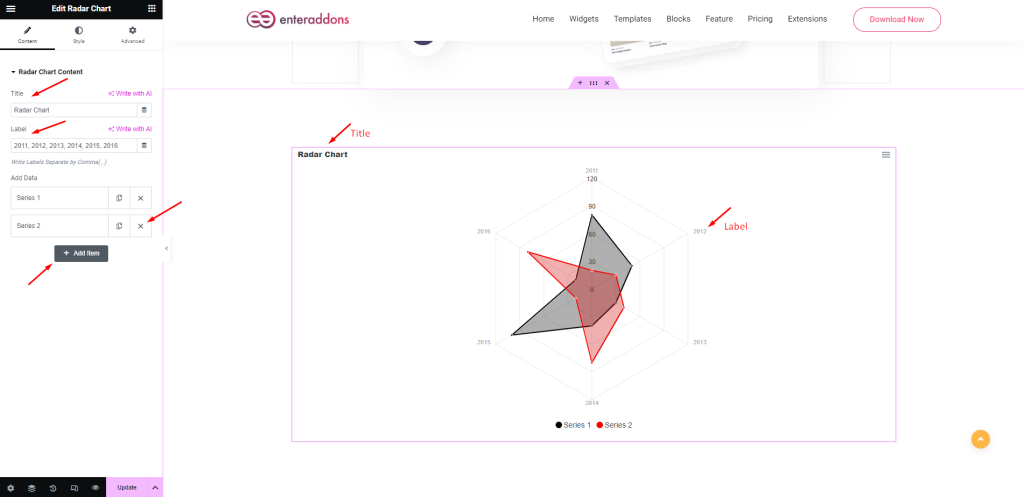
Then, from ‘Radar Chart Content’ section, you can add title and labels .You can add Radar chart data set with clicking ‘ADD ITEM’ button and remove any data set with clicking ‘X’ button, and that is given below.
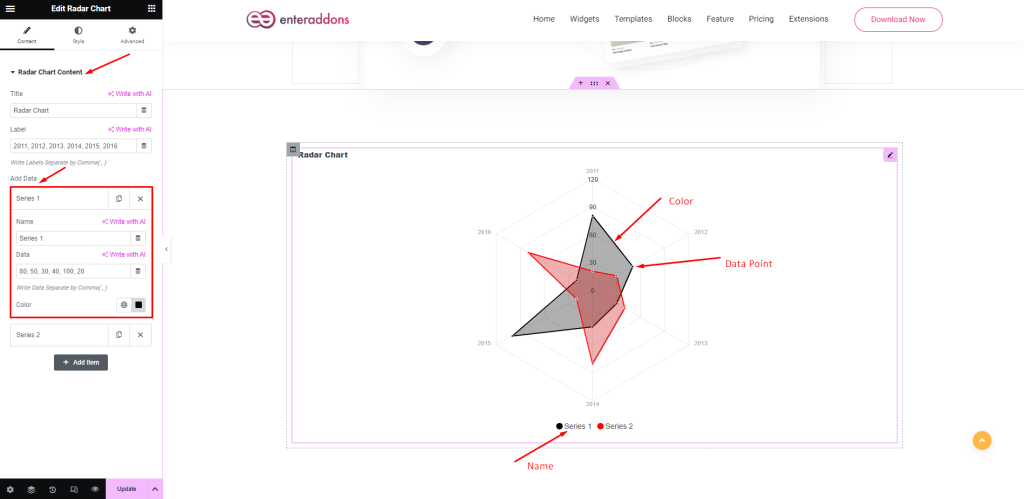
Then, from ‘Radar Chart Content > add data ’ section, You can take unique color, data and name for each radar chart items.
Step 2
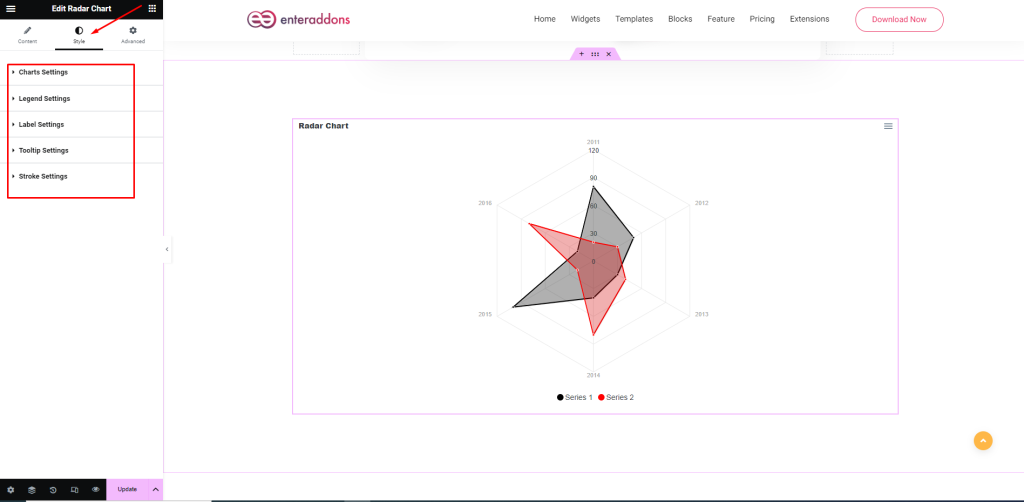
From ‘Style’ Tab you can stylize the widget. You will get the options Chart Settings, Legend Settings, Label Settings, Tooltip Settings, and Stroke Settings.
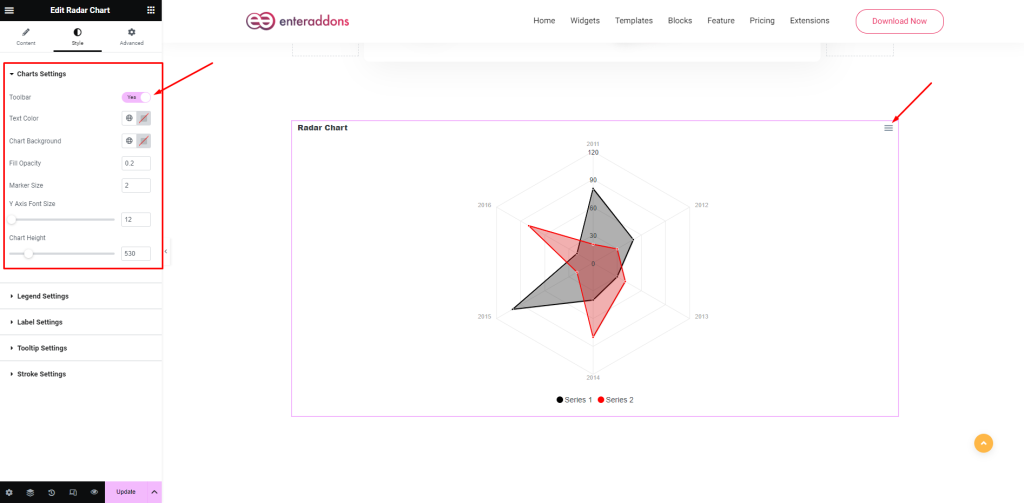
After that from ‘Chart Settings’ Section, You can edit text color, chart height, chart background ,fill opacity, marker size, y axis font size and enable toolbar respectively.
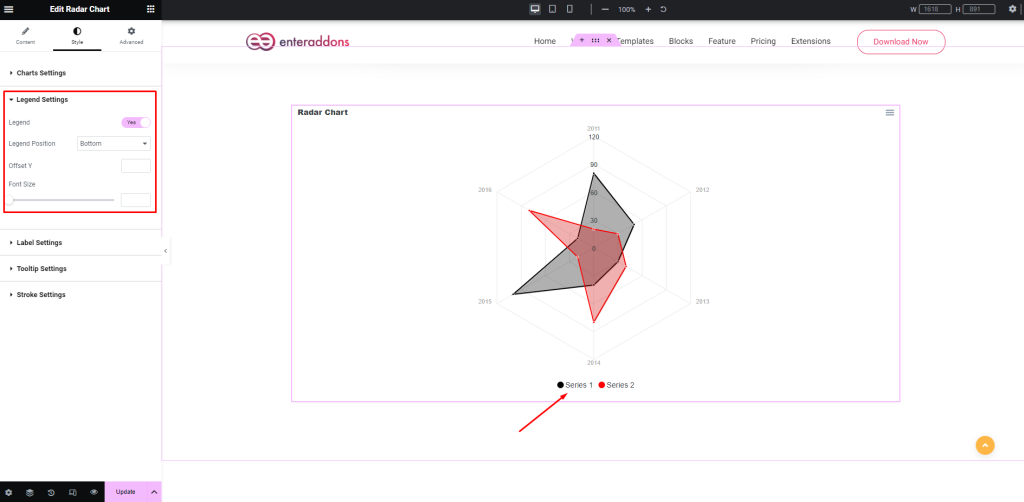
After that from ‘Legend Settings’ section, you can change legend show hide status, font-size, offset Y( top, bottom ),legend font size and legend position( top, bottom, left, right ) respectively.
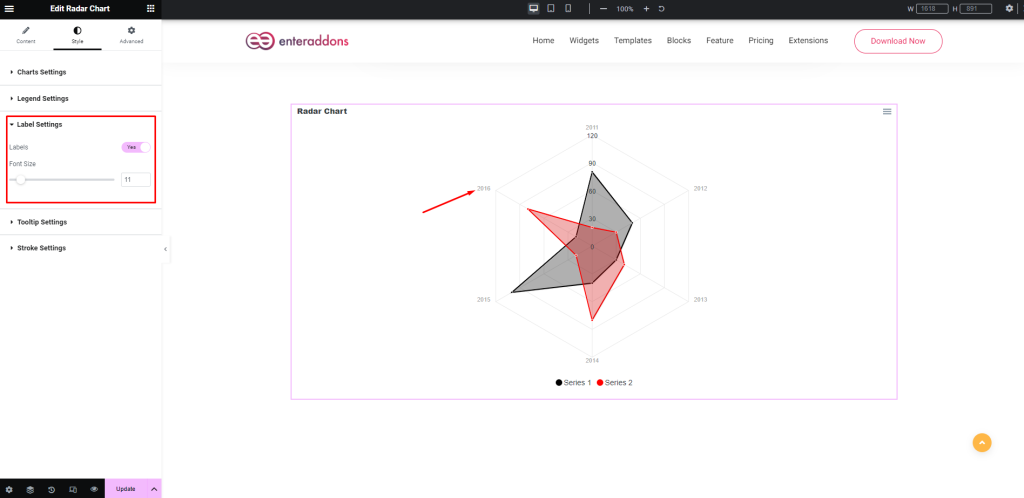
Then from ‘Label Settings’ section, you can enable labels and edit label font-size.
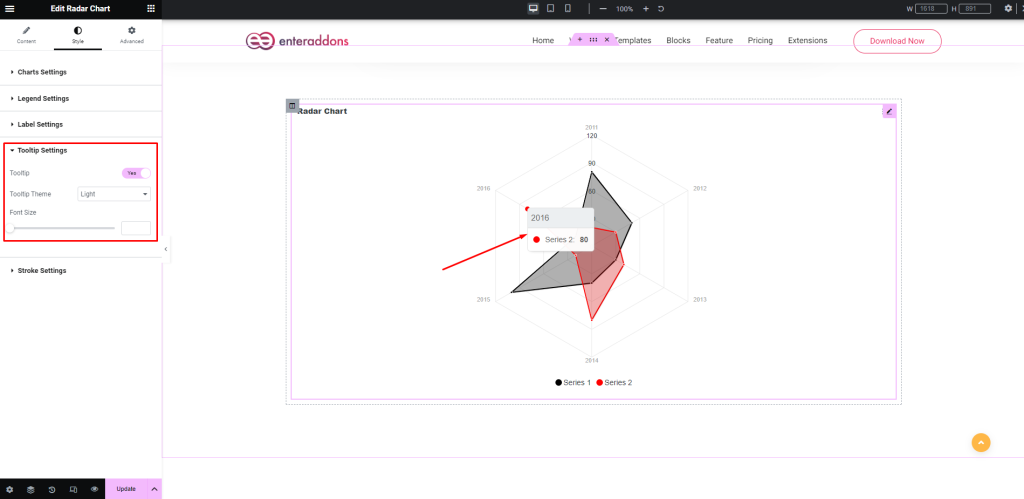
After that from ‘Tooltip Settings’ section, you can change tooltip show hide status, tooltip theme( dark, light ) and font-size respectively.
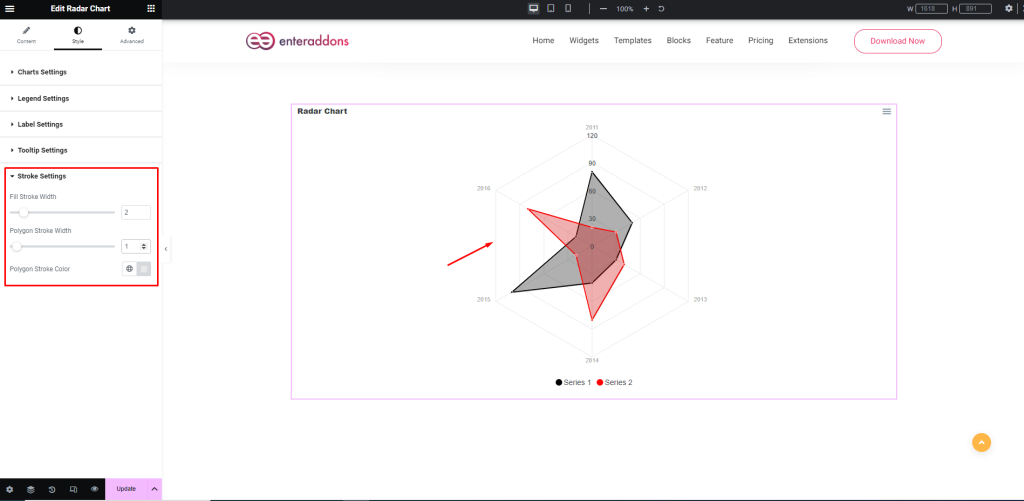
Then from ‘Stroke Settings’ section, you can change fill stroke width ,polygon stroke width and polygon stroke color.
Step 3
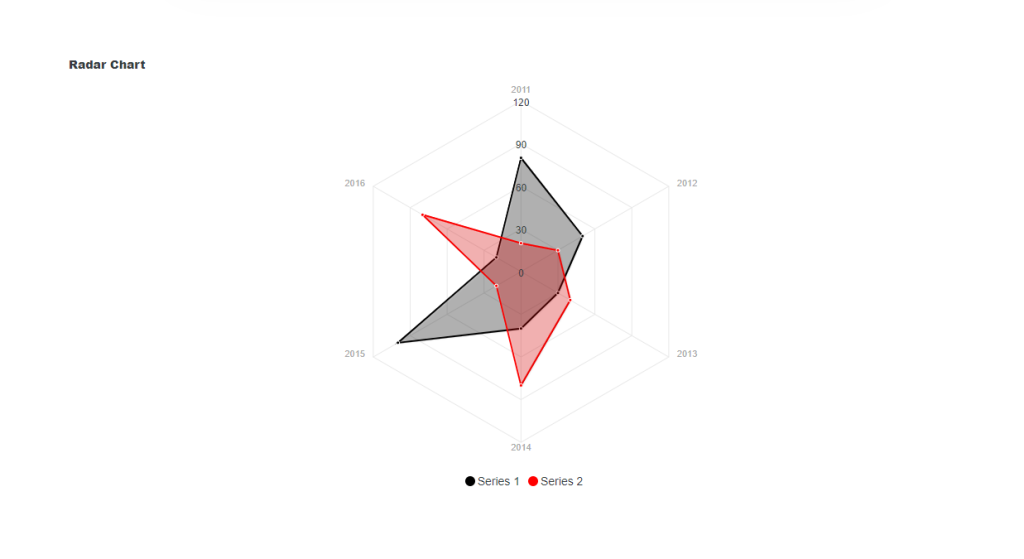
Finally, after finishing all the editing, click update and then click on ‘Preview > Preview in new tab’ to see your work live.
That’s it.